So, you’ve read How to Plan a Tent Wedding: Part 1 and you’re ready to dive deeper into planning a tent wedding in your backyard. We’ve already covered a lot of the basics: set up and tear down, event flow, permits, the more practical and logistical nature of the event, and electricity. Below, we will continue to explore areas of a tent wedding that are important to consider as you plan the details and offer an exceptional experience and night to remember!

HOW TO PLAN A
TENT WEDDING: Part 2
Tent weddings aren’t an easy feat, but they sure are beautiful. There’s lots to consider before committing to hosting a wedding on a private estate. We’ve compiled some of the most helpful information we can think to share!
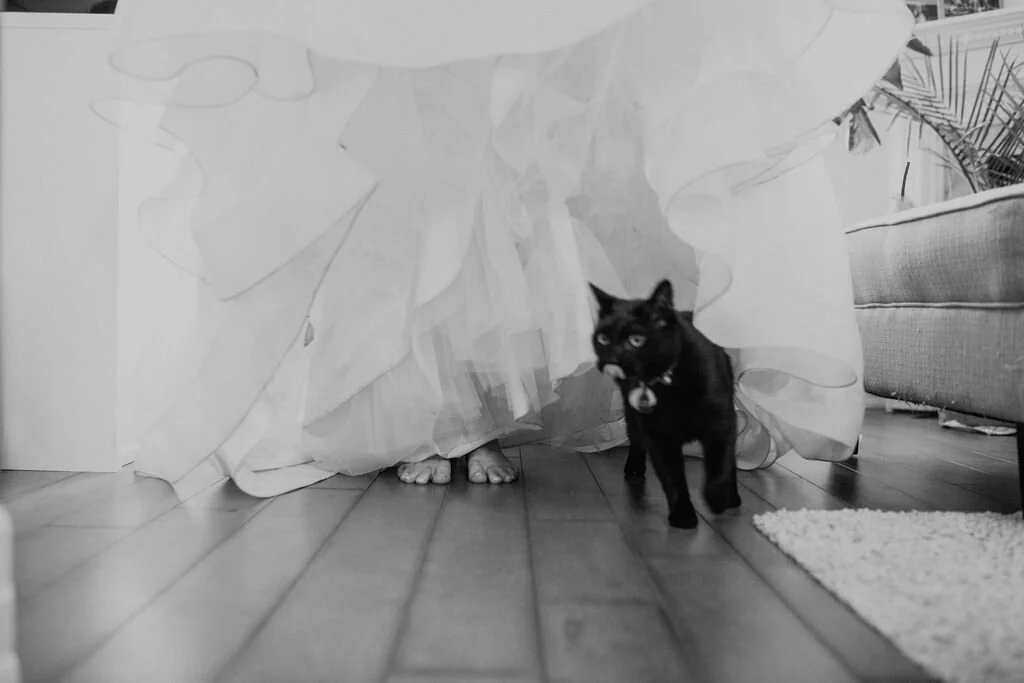
Image left provided by Will Reid Photo, florals by Forever Wildfield, and tent from Guelph Tents.
The OVERALL PROS AND CONS OF A TENTED WEDDING
There are a lot of unique elements and a lot of ‘pros’ that come with planning a tented wedding on private property, much of which has already been covered. For starters, you get the freedom to be as creative as you’d like, and to add as much personalization as you want. You’re open to options, within your budget, that suit your unique style and taste, which is not always possible at a regular venue. This also means control over every vendor and every detail - it is entirely your choice!
A tent wedding is also in a unique, often sentimental, setting: a family farm, a home where you grew up, a place you used to visit every year with friends, etc. It also gives you the chance to have additional events, in the same space, like a welcome party or a farewell brunch. Having it on a property next to a family home also allows certain VIPs (immediate family, the couple, etc.) to have a built-in place to stay which helps to reduce who is traveling to and from the site.
With every pro, comes a few cons to consider and to help decide if a tented wedding is right for you. To start, almost everything needs to be brought on-site and coordinated, which can be tricky when there is no venue coordinator to immediately take this on so this often lies with the property owner, the couple, and a hired planner. It is also important to consider any wear and tear on the property from deliveries, vehicles, and the movement of people and things over the course of a few days. This may also result in additional days taken off work to oversee the coordination of the site.
You are also at the mercy of dear Mother Nature. Being out in the elements can sometimes be an issue if there is a bad storm, or if it gets cold at night in the spring or fall. Having plans in place for both of these is necessary to ensure a successful event.
BUDGETING
Creating a budget for anything can be tricky, especially when you have the level of customization as a tented wedding. There are a few unknowns, and endless options, depending on the level of the event. From structure to comfort, there is a long list of things to be considered. Below are some tips on how to focus your budget, while making sure it is as realistic as possible.
Have a good sense of your aesthetic. Source as many pictures as possible and organize them per section of the day (ceremony, cocktail, reception) to get a clear sense of what you like. This can be brought to a planner and designer to help price everything out and prioritize what’s important.
Over portion your costs as you estimate spending. You are essentially building a venue from the ground up, so add 10-15% on each line item to ensure you’re covering what you need, with a bit of contingency, before you start signing on the dotted line.
Prioritize elements of the event. What are the most important parts of your wedding? What are the least important? This helps to move line items around to be able to afford those things you can’t do without.
Consider the size. How big does the tent need to be? How many guests? Does the caterer need their own tent or are they bringing their own? Are there washrooms on-site or do you need to rent them?
Start section by section and work your way through. Do your research! It doesn’t hurt to get as much information as possible.
TYPES OF TENTS
Frame Tents
Frame tents are one of the most popular tent styles available for weddings given that they create an open floor plan underneath. Without the need for supporting poles inside, there aren’t any structural elements to work around. This means tons of options for your layout.
The frame tent structure is created by a metal frame, meaning it can be set up virtually anywhere —installed on grass, pavement, a deck, a patio area, or other level surfaces. Frame tents are staked, or “blocked”. Blocks or ballasts are large concrete weights used to anchor the tent when there is no soft ground to stake or peg into. It’s worth noting, while blocks are convenient for erecting a tent on hard surfaces —concrete, pavement, or decks— they’re an eyesore. Not to mention, an added cost.
The tents must be stabilized and held down for safety and battling wind. Some frame tents include the option of installing metal bars at the bottom of the sidewalls. This prevents walls from billowing in high winds.
Transparent frame tents —aka “clear top” tents— use a frame tent base but are covered by a see-through material instead of opaque. The lovely effect makes it feel as though you’re outdoors, even under cover. While this look allows for natural light, the downfall is that it does not offer shade and creates a greenhouse effect. In the height of summer or warm weather climates, it’s not ideal.
Pole Tents and Sailcloth Pole Tents
Pole tents, also called “tension top” pole tents, are tied with frame tents for popularity in the wedding industry. The elegant, curved roof line is created by the tension between the centre poles and the perimeter poles. This style of tent is also stabilized by supporting guy wires staked into the ground or into blocks.
While these tents tend to be a cost saver —they don’t require ceiling lining or draping to feel immediately elegant— they do come with a few drawbacks: they aren’t as flexible in size and the center poles can create floorplan and sightline challenges, with the number of support poles will vary depending on the size of the tent. Lastly, pole tents don’t come with the option of metal bars at the bottom of the sidewalls to prevent tent walls from billowing in high winds.
A Sailcloth Pole Tent is an upgraded version of the pole tent with modern designs and features. It has rounded ends which creates a circular look at its smallest size and adds soft corners on the extended versions. Sailcloth tents also use a canvas-like fabric constructed of more natural elements, which is much lighter than the vinyl fabric typically used in pole tents. A sailcloth tent will let more light in and out of the tent because the fabric is not completely opaque.
Marquee or High Peak Tents
The marquee tent is a blend of pole and frame tent styles. It takes the support system of the frame tent to create a peaked ceiling without needing a center pole. These can be set up on any terrain, so it offers flexibility in placement. Because of its use of the frame tent support system, its guy wires can also be anchored to the ground using concrete ballasts.
This style also allows for an open interior making it flexible for layout and the high peak ceiling gives it an elegant look without the use of ceiling lining or draping. That said, because the roof is a one-piece top, marquee tents don’t lend themselves to larger events as they can’t be extended using additional panels like frame tents.

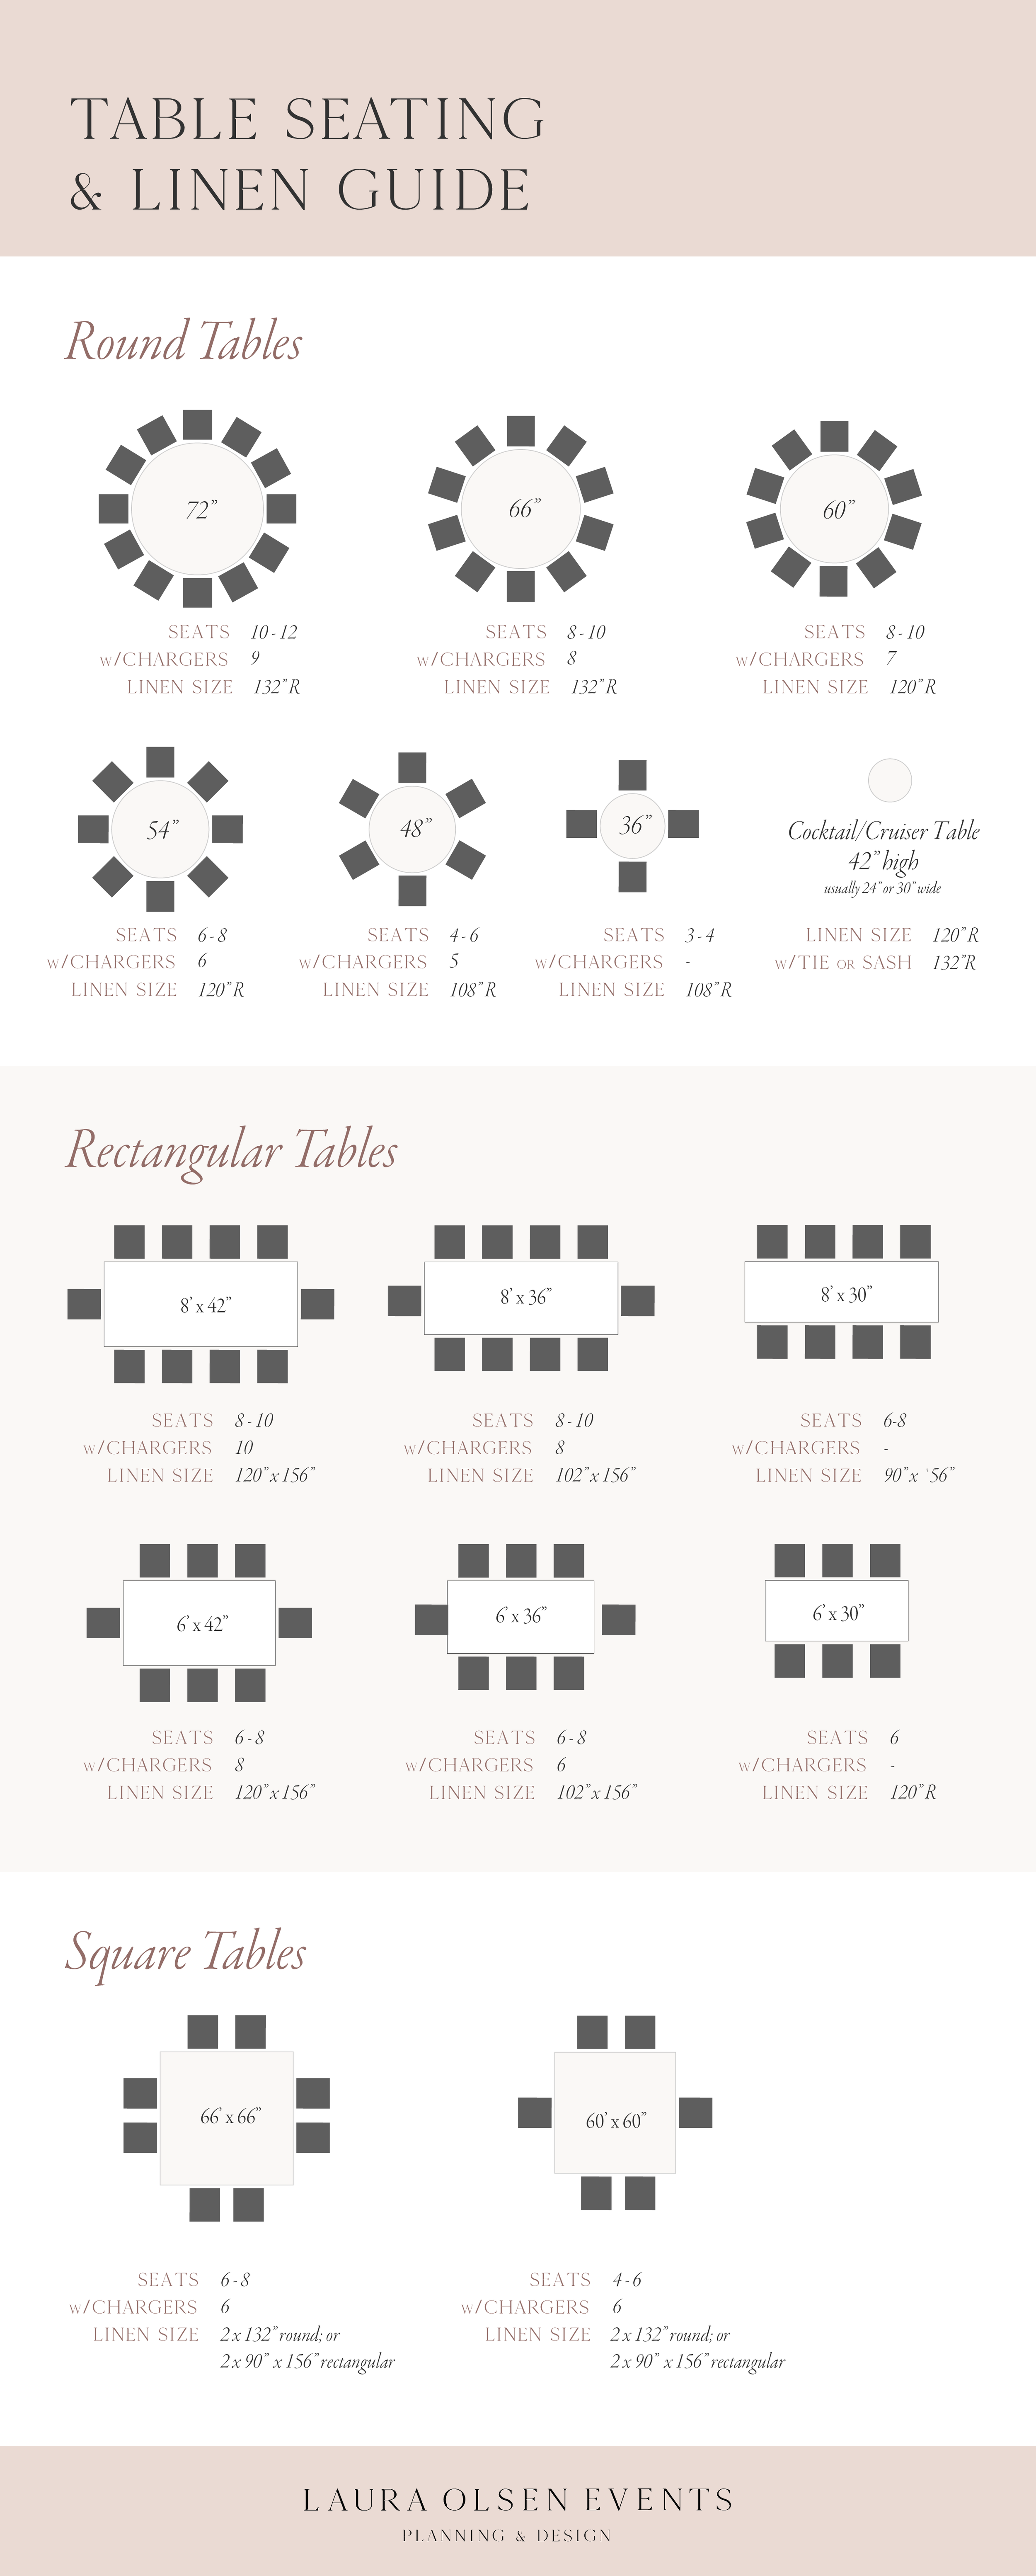
CAPACITIES
Number of Guests | Approximate Size of Tent or Square Footage
175 - 225 guests | 60’ x 70’ or up to 4500 sq ft
125 - 175 guests | 40’ x 90’ or up to 3500 sq ft
75 - 125 guests | 40’ x 70’ or up to 2600 sq ft
50 - 75 guests | 40’ x 50’ or up to 1750 sq ft
50 guests | 40’ x 30’ or up to 1000 sq ft
*Ensure to plan for a detailed meeting with a tenting professional to ensure your wedding or event has exactly what you need for the space!
FOOD & BEVERAGE
Food service can be one of the biggest challenges for a tented wedding. You have to create a temporary kitchen, in the right proximity to the tent, and bring in all of the rentals you’ll need to ensure service is smooth. Many off-site caterers will include necessary rentals in their quote, along with any requirements for their temporary kitchen setup.
The temporary kitchen will need to be set up close to the tent, sheltered from the elements, and include elements such as ovens, coolers, and space for plating, service, and clearing. They will also need sufficient lighting and power to plug everything in and ensure it doesn’t blow any fuses. It is never safe to assume a garage, barn or other existing structure is suitable for a caterer. It is highly recommended to have a site visit with your caterer well in advance of the day to review the layout, set up, and tear down as well as drop off and pick up of deliveries/materials.
All of these added details only increase the budget and can come with unforeseen costs depending on the menu, service, and style. These are early-game conversations required before you start spending on prettier stuff!
For alcohol, a huge benefit of hosting this on private property is that you can purchase your own alcohol and have full control over the flavour, quality, and cost: you pick it all! However, it is important to consider how much you need to buy, where you will store it and cool it, and who/how it will be served. There are many calculators online for drinks per person but a simple rule of thumb is to assume 1.5 drinks per person, per hour, and split it between wine, beer a liquor. Consider hiring the right number of bartenders, a bartending company, or inquiring with your caterer if they can also provide these services. We always err on the side of more staff because it means someone can always float to wherever they are needed at the moment.
WEDDING WEEK
When considering hosting a tented wedding, you also have to think about the days leading up to and after the event. As mentioned above, you have the ability to host additional events under the tent. These tents and rentals tend to come in the day before the event, and won’t get picked up until Monday, so it gives you a chance to use it in more than one way! You can host a welcome party for out-of-town guests, wedding party, or close family, or host a farewell brunch party the morning after for anyone staying on property or close by. Weddings can be a crazy day, and these events allow you to have more special moments with your guests.
There is also the logistical side of the week to account for: multiple days of installation, vendors dropping things off, setting up, and then tearing it all down a few days later. This requires supervision, direction, and planning to ensure it is a coordinated effort. If your wedding is on a Saturday, your could see your wedding week following this general structure:
Wednesday: Final inspections of site (ie. for locates for tent pegs, confirmation of permits, etc.)
Thursday: Delivery of large items such as tent and flooring, washrooms, generator
Friday: Delivery of any rentals such as tables, chairs, linens, bars and bar carts, arbours, etc., and the time to set them all in place
Saturday: Final set up touches such as linens, place settings, stationery, signage
Sunday: Clean up! Garbage disposal, organizing rentals to be picked up
Monday: pick up of rentals such as tent, flooring, generator, etc.
Tuesday: a survey of the property for any wear and tear and post-wedding maintenance
It becomes almost a full week of activities to ensure everything comes in and goes back out as smoothly as possible!
A PLANNER’S ROLE
The best investment you can make is hiring a professional wedding planner who has experience in tented weddings to help you navigate the complexities of your wedding day. However, there are a few things to keep in mind as you begin to meet with planners.
There are additional vendors, and more responsibility, for the planner to source and manage and so this is reflected in their terms and services, as well as their compensation. An experienced planner will know the intricacies of a tented wedding and be able to speak to that as they learn more about your event. This speaks to the expectations you have as their client, they have of you, and the expectations and flexibility that the location can offer. A site visit as part of your discovery call with a planner is beneficial for all parties involved, to really understand the scope and requirements.
They will also have to have their own plans for set up and tear down, where their role is most important, and how they will support you and the property owner throughout the process. Clear communication and transparency of what they can and cannot offer are important for both you and them as you look to sign an agreement or contract.
Your planner becomes a venue coordinator and so their expertise is instrumental in the success of the event - don’t underestimate that value!

Don’t forget that we have more details in part one! How to Plan a Tent Wedding: Part 1.
NOW AVAILABLE
GATHERED
The Planner’s Approach to Outdoor Celebrations
Gathered is the practical, experience-backed guide for wedding planners, curious vendors, and couples ready to take on the beautiful chaos of an outdoor tented celebration without the costly surprises.